I wanted to do some little projects during my free time between jobs, and metal-fitted chests/boxes are nice projects to do. They allow me to work on my woodcrafting and metalworking skills at the same time, while also giving a value to my camp setup (you can never have enough storage).
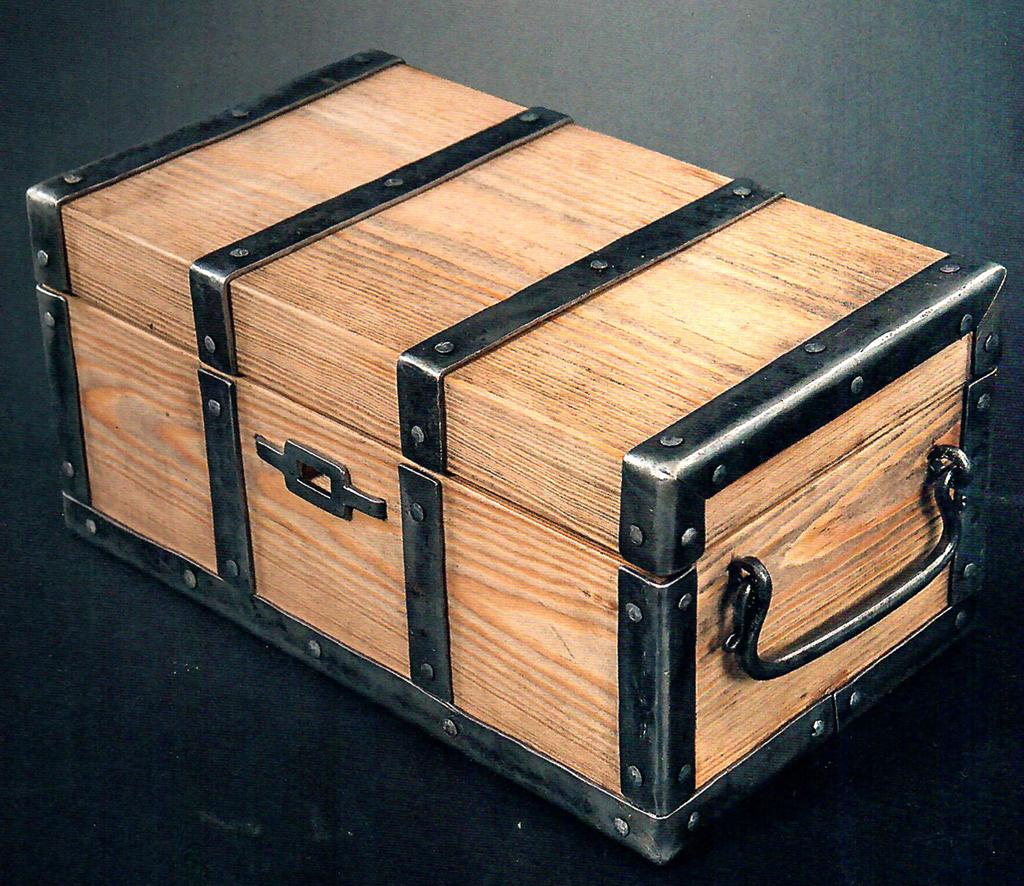
I have the swedish book „Begravd pa Birka“ (the english version, „Buried at Birka“, is out now, and can be bought directly from the author here: Buy at myhoney.se), and it has a very nice reconstruction of a little chest/box from Birka grave 539. It looks like the right size to store the miscellanea that you always keep looking for: Sewing kit, whetstone, „rust eraser“, etc. etc.
So I took a look at the replica and the finds, and decided to take up the opportunity to revive this ailing blog a little.
The grave
Grave 539 is relatively sparse, with two single-shell tortoise brooches (making it a female grave from the 9th century, as single-shell tortoise brooches fell out of fashion after that), some more jewelry, knife, scissors and a green glass that is now known as the „pineapple“ in the reenactment scene. It’s not a spectacular grave, were it not for the box and bucket.

Description of the box
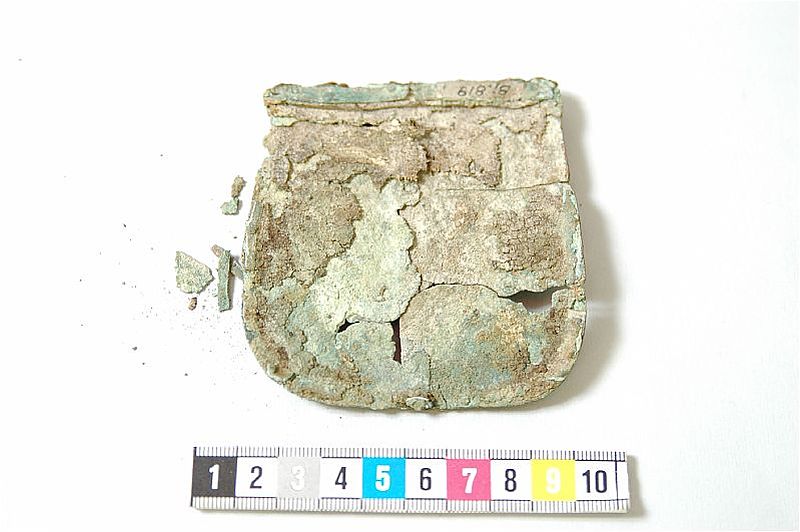
As usual for Birka, not a lot of organic material could be recovered of the wooden box from grave 539. However, the metal bands and remains of lock and grips were found, leading Arbman to the following description:
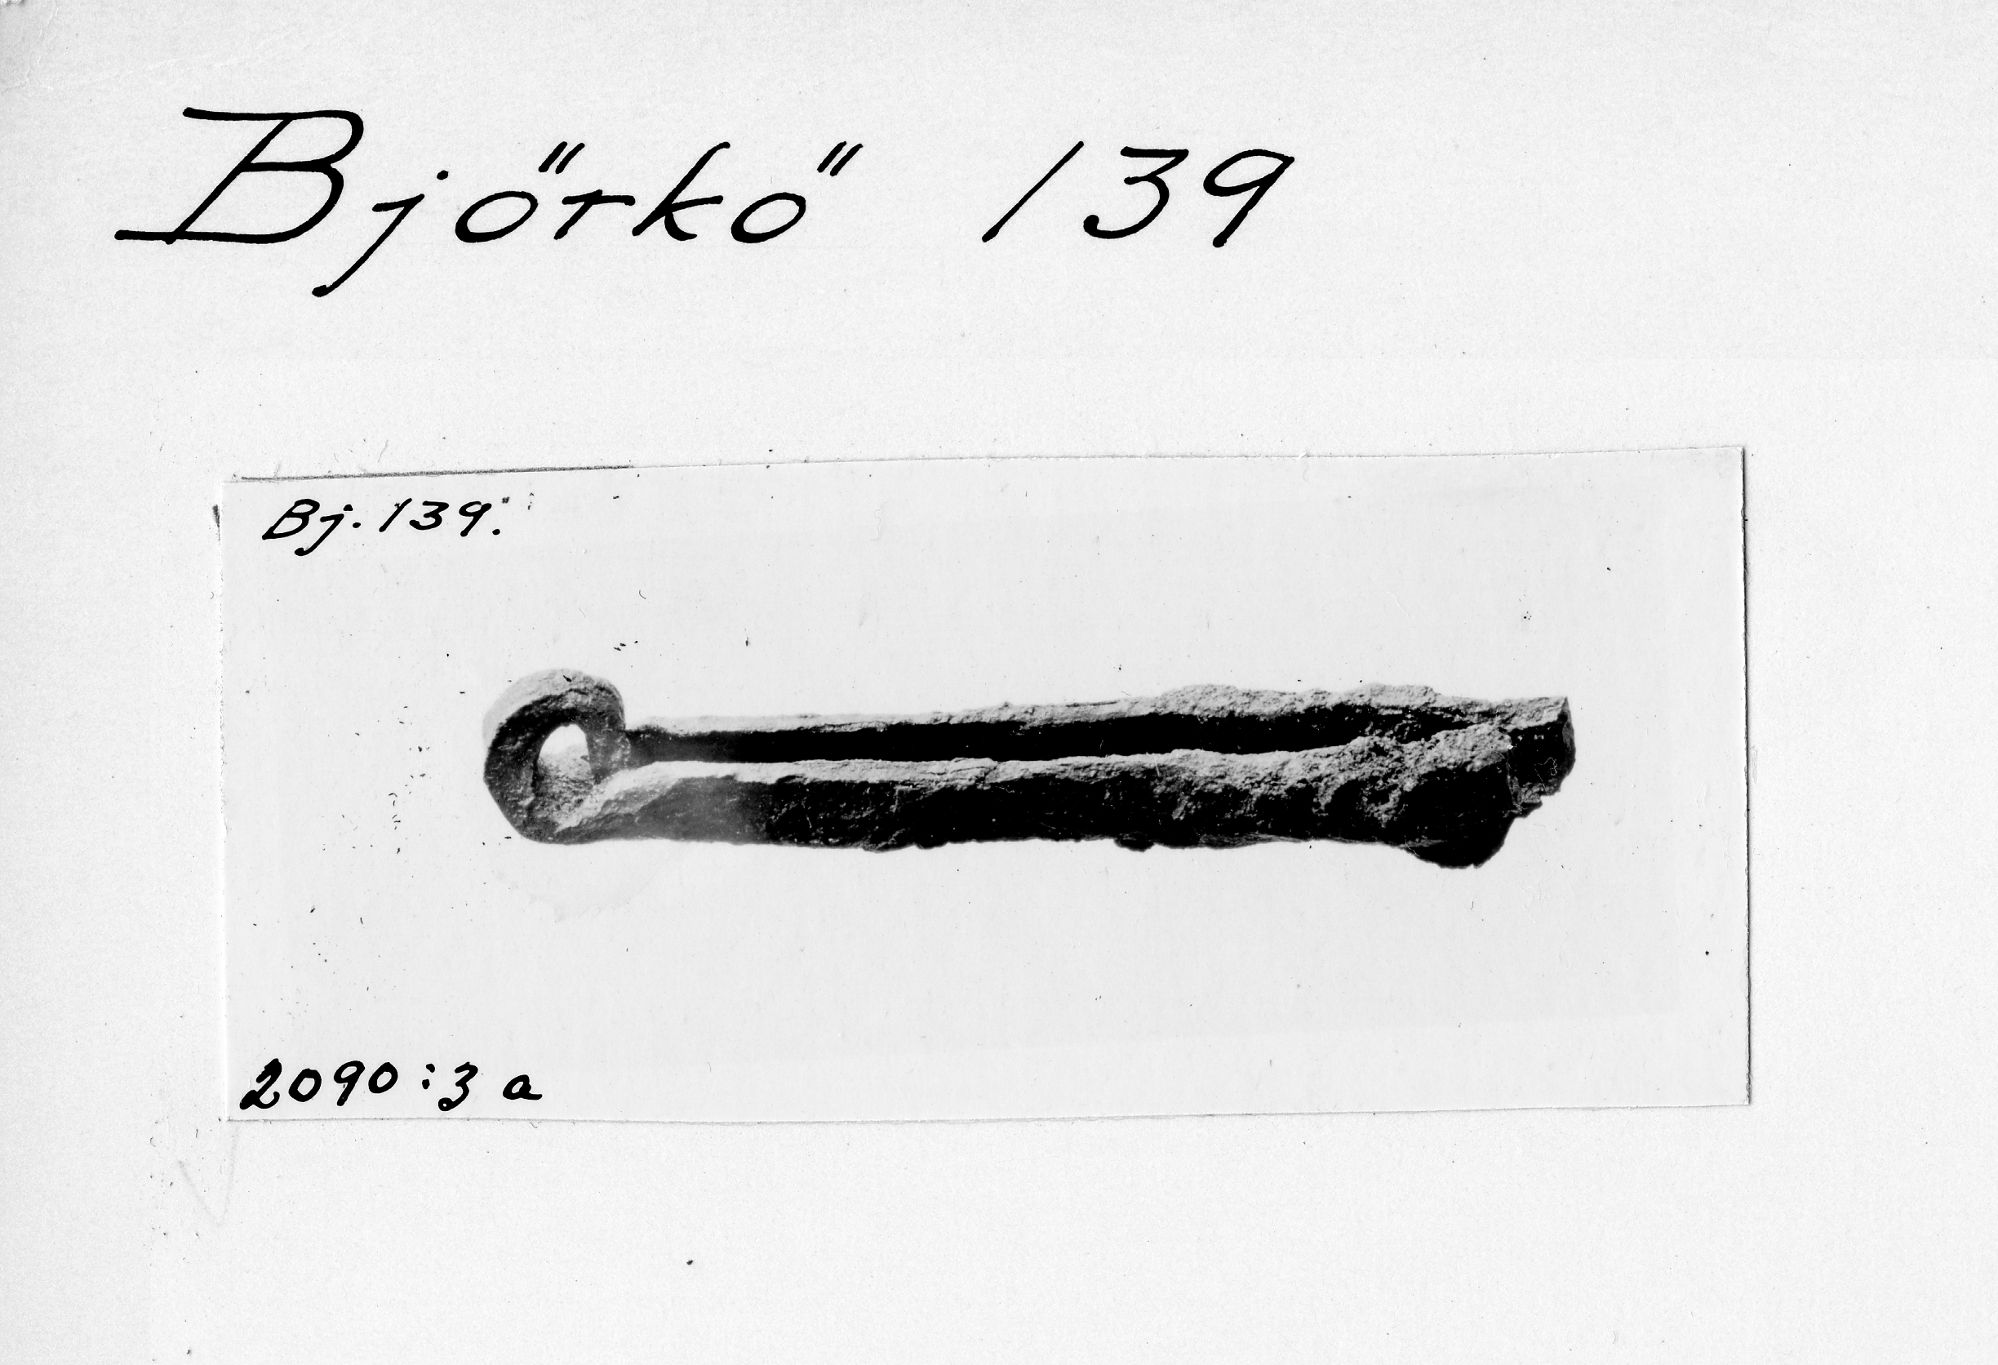
An dem 0. Ende der Grube eine 5 cm tiefe Senkung des Bodens (auf dem Plan punktiert). In dieser eiserne Kästchenbeschläge (116:7) und Holzeimerbeschläge (116: 8). Das Kästchen war nach Stolpes Skizzen, Abb. ’17, etwa 19 cm lang, 12 cm breit und 7,5 cm hoch, hatte auf der Vorderseite ein Schlossblech, Abb. 117, mit viereckiger Mittelpartie mit runden Löchern und ausgezogenen, als Nägel gebrauchten Enden, Länge 10,9 cm, Breite 2,6 cm, auf der Rückseite zwei einfache Scharniere, vgl. Taf. 269:1 rechts, die Spitze umgebogen, Länge 9 cm, Breite o,8-1,2 cm, und auf der einen Schmalseite einen Henkelgriff, alle diese Stücke stark verrostet, der zweite Henkelgriff und der Haspen fehlten schon bei der Ausgrabung, siehe Abb. 11
Arbman, Birka I: Text, p.166
This translates to:
At the eastern end of the pit, a 5cm deep lowering of the ground (dotted on the grave plan). In there, chest fittings (116:7) and bucket fittings (116:8) from iron. The box/chest was after Stolpe’s drawings (fig.17), about 19cm long, 12cm wide and 7.5cm high, had a locking plate on the front (fig.117), with a four-sided middle portion with round holes and drawn ends, used as nails, length 10.9cm, width 2.6cm, on the back side two simple hinges, cf. pt 269:1 on the right, the point bent, length 9cm, width 0.8-1.2cm, and on one of the narrow sides a handle, all these items strongly corroded, the second handle and the hasps were missing during excavation, see fig.11
Arbman, translated by the blog author
Let’s try and sort this a little into a more convenient list:
- Wooden box with iron fittings and bands
- Measurements of the box: Length 19cm, width 12cm, height 7.5cm. That’s tiny!
- Lock on the front
- Two simple hinges on the back
- Handles on the narrow sides of the chest
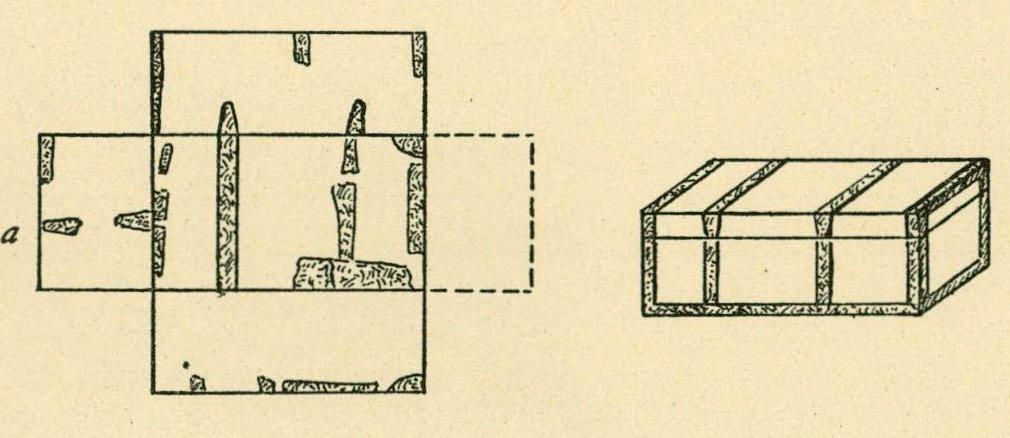
The box is really, really small.
The wooden remains
Unfortunately, there is no information about the type of wood, the thickness or other constructive details of the wooden box itself.
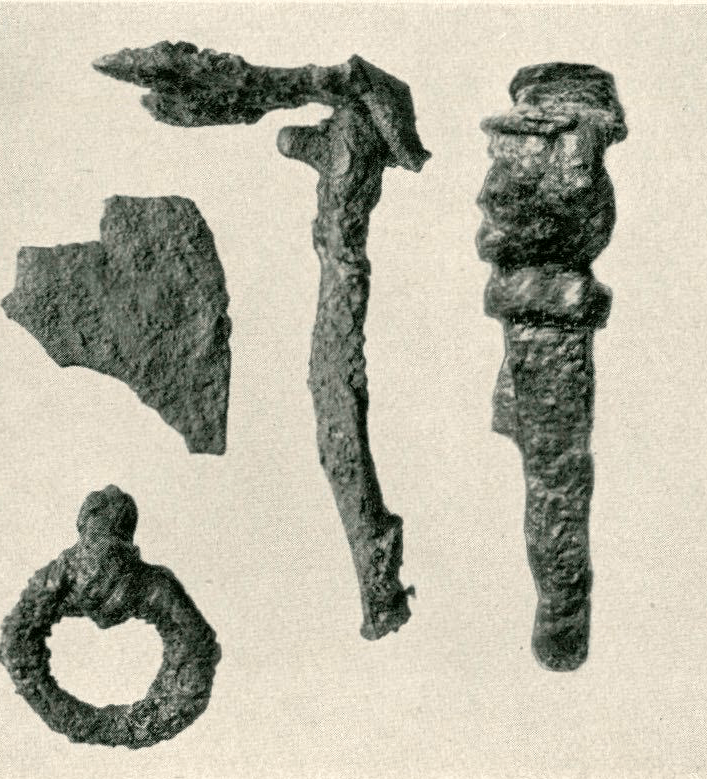
The metal remains
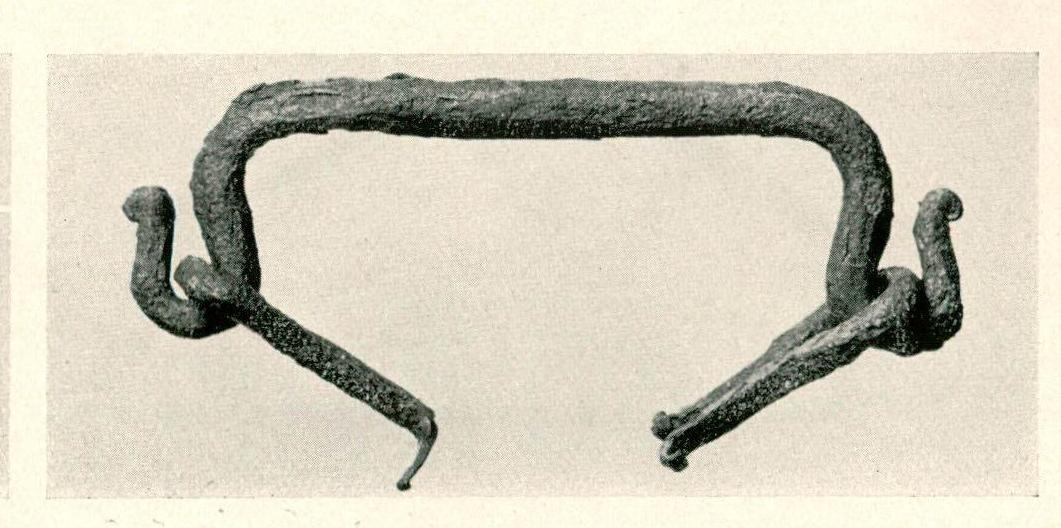
The hinges
The hinges are supposedly from a similar type to the ones in pt. 269:1, pictured below. If you look closely,
The handles
The handles aren’t visible in any of the photographic documentation at my disposal (they’ren neither in the SHM database nor in Birka I: Tafeln), but I assume they might have looked similar to the handles from grave 367, a pretty generic type of handle which is easy to make.
The iron strips
Unfortunately, there is also no documentation about the iron strips or bands that were nailed to the box. From the replica made at SHM, I’m deducing that they must have been as wide as the hinge (Arbman says: 0.8 – 1.2cm width), and bent around the corners of the box to protect them. Nothing is said about the nails that attached the bands to the wood, and there is also no information if these nails were bent over or riveted on the inside (or short enough to not protrude from the inside of the box).
The locking mechanism and its parallels
The locking plate from Bj539 is described as „with bent ends, used as nails“. I don’t honestly understand how Arbman came to this conclusion, because the find doesn’t seem to support it. At least from the drawing in Birka I and a picture by Linda Wahlander in „Begravd pa Birka“, it doesn’t look like Arbman’s assumption is correct.
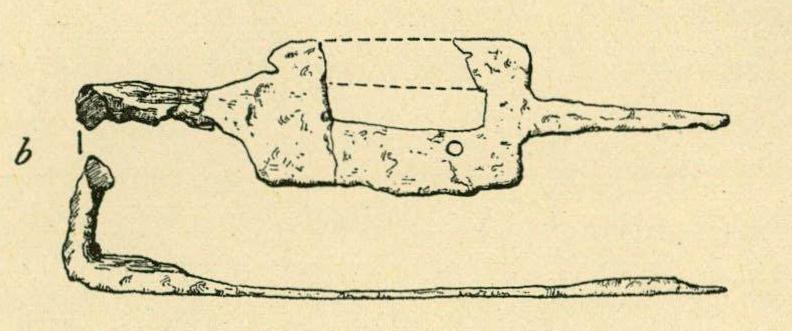
On the contrary: I personally think that this is the remainder of the actual locking mechanism, with a slider (that was usable from the outside) on the left, bent 90 degrees, and the locking plate in the middle. The rectangular hole in the middle was used to push the key from the outside to the inside, then turn it and pull, pressuring through the hole (and its now lost counterpart on the top of the lock plate) and releasing a spring that blocked the sliding mechanism.
The pointy part on the right was the actual lock, and it reached through the hasps to lock them.
How did I arrive at this conclusion? I looked at some comparative material in my own garage. Pictured below is a small chest from cherry or plum wood, made by Tobias Molz, and it has a lock with one hasp and a lever on the side to slide it.
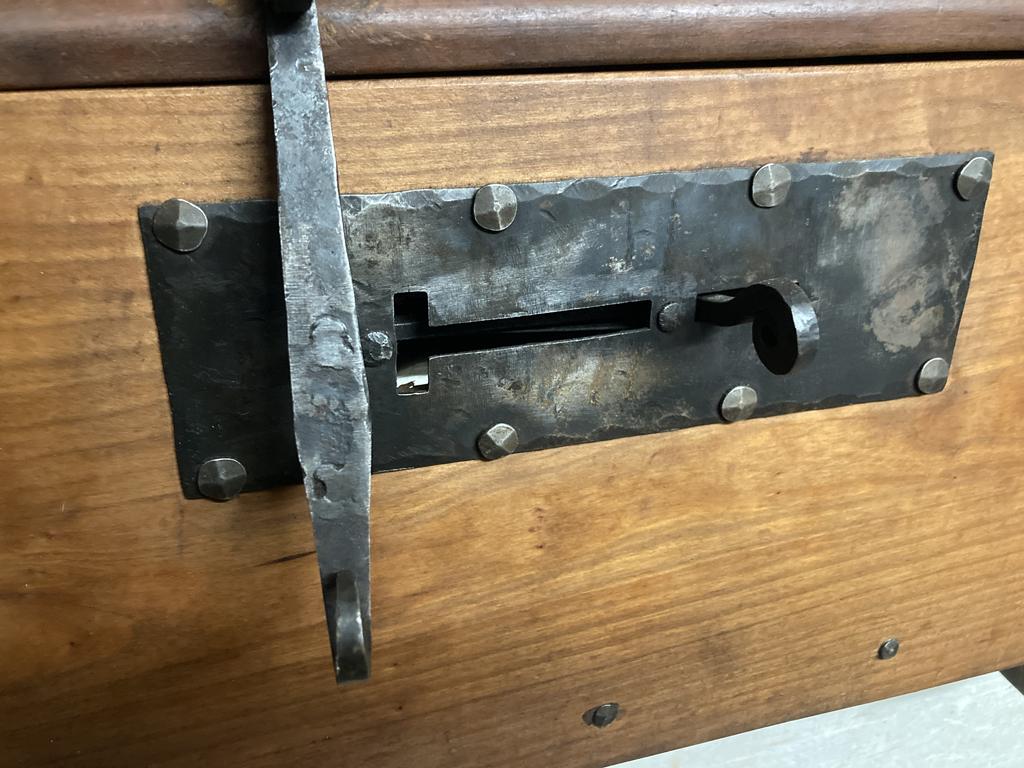
I thought that this type of lock is a stylized version, not according to any find, but I was wrong – there are many parallels and it is indeed based on finds (although still stylized by the modern maker).
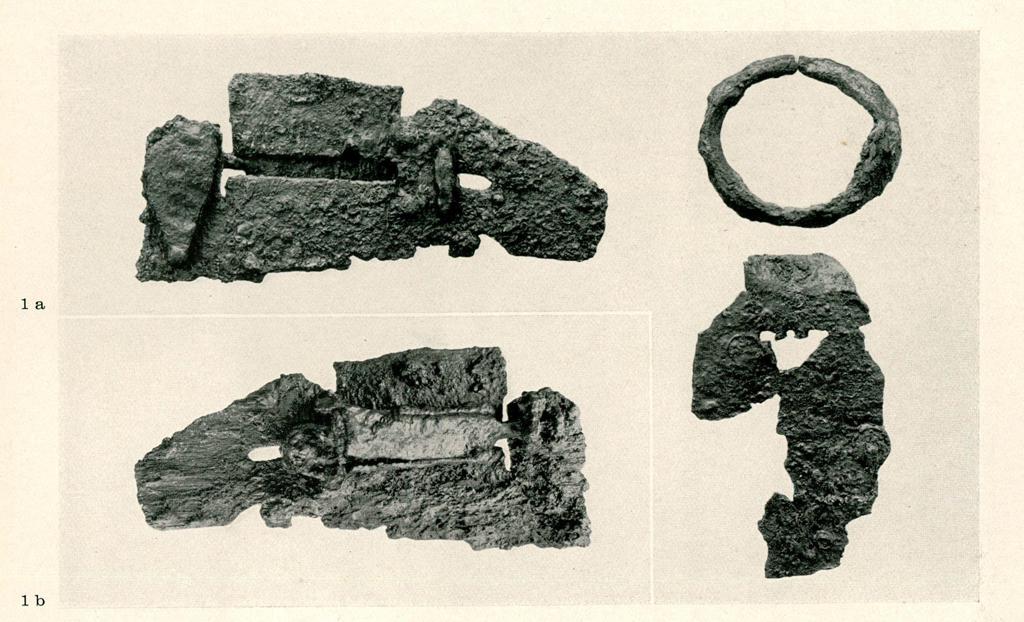
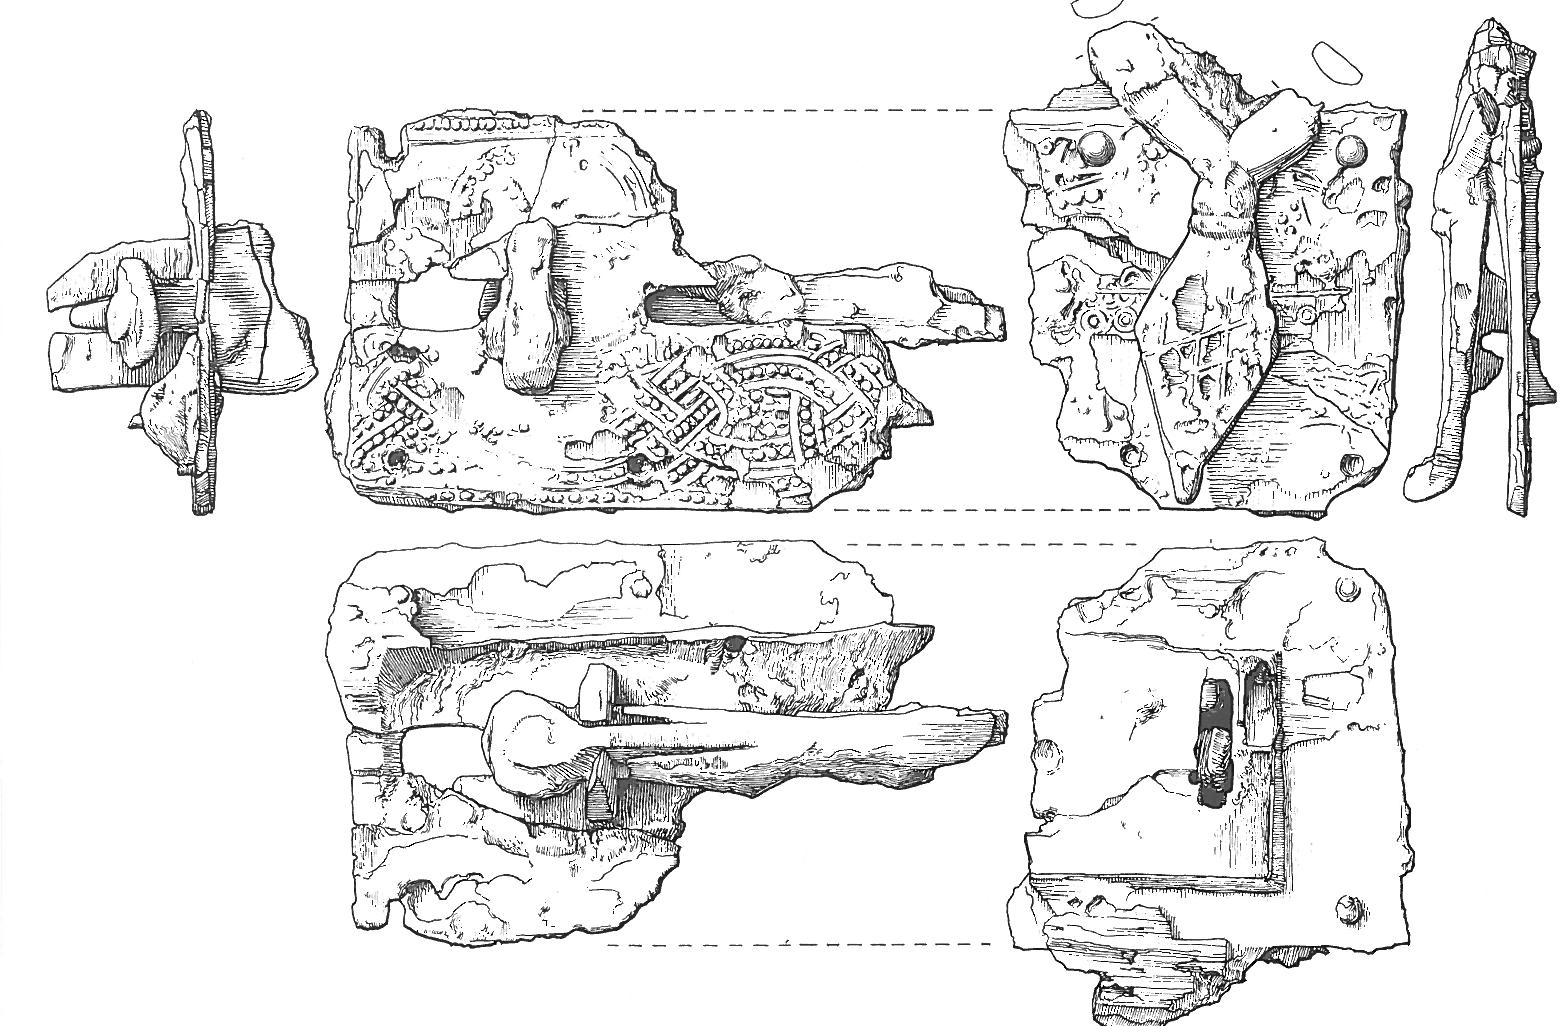
The picture above shows exactly this type of lock in a find from Birka, grave 963. The key is inserted on the left in the vertical slot (directly next to the hasp), pushes into the springs visible in the bottom image, and allows the slider to move and unlock the hasp.
The mechanism in the lock from Bj539 was probably a little different, and more comparable to what is shown in the schematic below.
This also explains the clearly visible round hole, which obviously did not contain a nail (or else it would have been corroded with said nail), and I would assume that a second hole was in the now lost part of the lock plate.
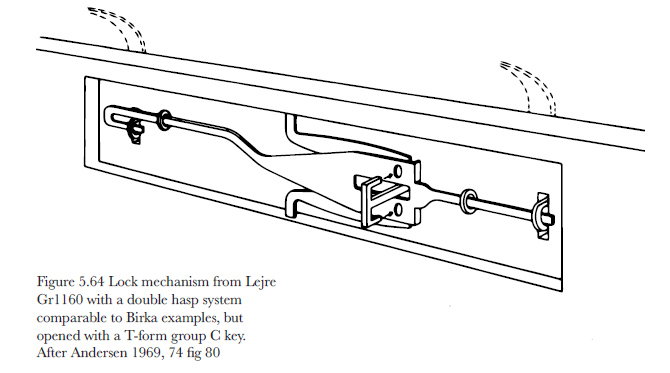
Another nice example of a single-hasp lock with a sliding bolt and an external slider is from Fyrkat grave 4 – again, this uses a C-shaped key to unlock the lock.
Here is a schematic of the lock from Fyrkat grave 4 – the slider is visible in the right hand part of the schematic (dark grey).
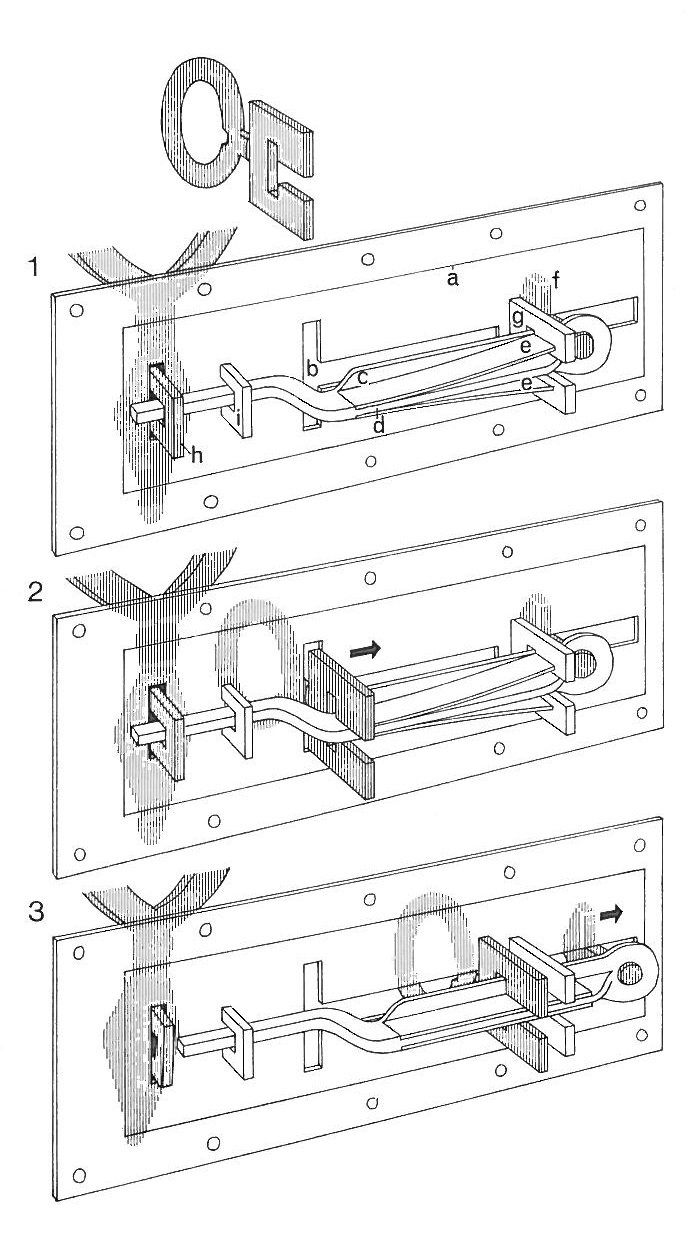
In my opinion, the lock plate was an internal part of the lock and not – as in the replica – an external part. The lock itself corresponds to other finds from Birka.
To do: My own replica
Now, I’m making an „inspired“ version which is substantially upscaled, just to practice my woodworking skills, and to be more practical. Maybe I’ll post details about it later, and maaaaaybee I’ll finally try making the lock, too. It is about time that I try my hand on one. It could be my new firemaking (tinder, fatwood, flintstone) box, or contain my sewing and repair kit, who knows…