Making beef tallow for authentic lighting

Some things that now seem hopelessly anachronistic and are dead cheap weren’t that cheap in former times. Artificial light, for example, was far from a commodity. Candles were, at least as far as we know, too expensive for everyday lighting, so viking-age buildings were sparsely lit. The central fireplace gave off some light, and there are several finds of items that held a liquid or solid fuel for lights.

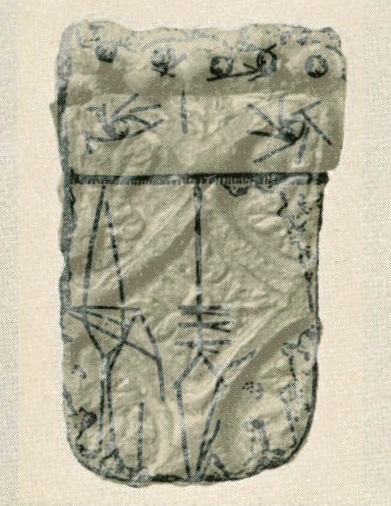
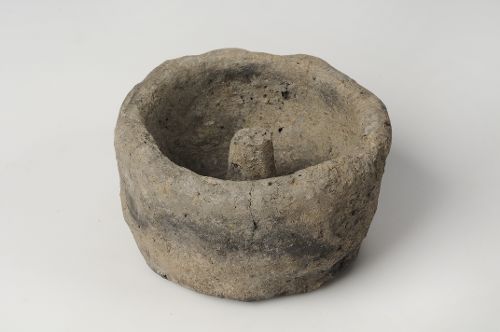
This is a find from Birka, Black Earth (various identical lamps were found in Birka).

The fuel for these lamps was quite certainly animal fat, as vegetable fats (such as olive oil, linseed oil or other vegetable oils) were, and are, too expensive to burn, and have a couple of disadvantages. One of them is the fact that animal fat, especially pig and goose lard, or beef tallow, have a higher melting point, making them easier to handle.

I have one of these lamps as a reproduction, and for the past seasons, I used it with pig lard. This type of fat is readily available in supermarkets (it’s used for cooking), and is not too expensive. However, it’s not one hundred percent authentic and – which is really annoying – it turns liquid at room temperature, making summer events a really greasy affair if the lamp falls over.

I wanted to use beef tallow for a while now, but I never found any in butcher’s shops or supermarkets. Eventually, I thought „why not make it myself?“. We are lucky to have a really awesome farmer around the corner, who raises their own cattle (organic, by the way), and is in control of the whole butchering process. To add to this, they have a son in the same kindergarden as our kids, so I went there and asked if they could help.

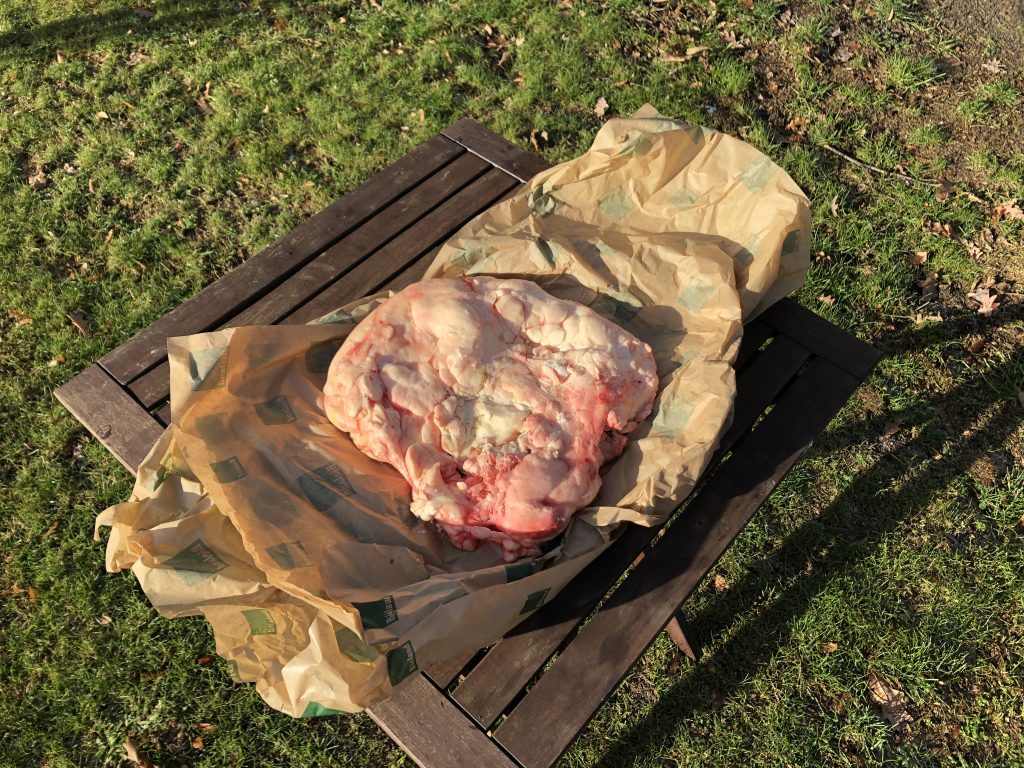
Alas, they had no tallow, but they were just about to bring one of their Galloways to the butcher, and promised to set aside the fat around the kidneys, which is traditionally used to make tallow.

A week ago, I picked up these lumps of fat (around 4.5kg, one of two lumps shown). They have an interesting consistency – they aren’t greasy like bacon, instead they feel like wax. I put them in the garage to wait for better weather.

Cowkidney fat before cutting

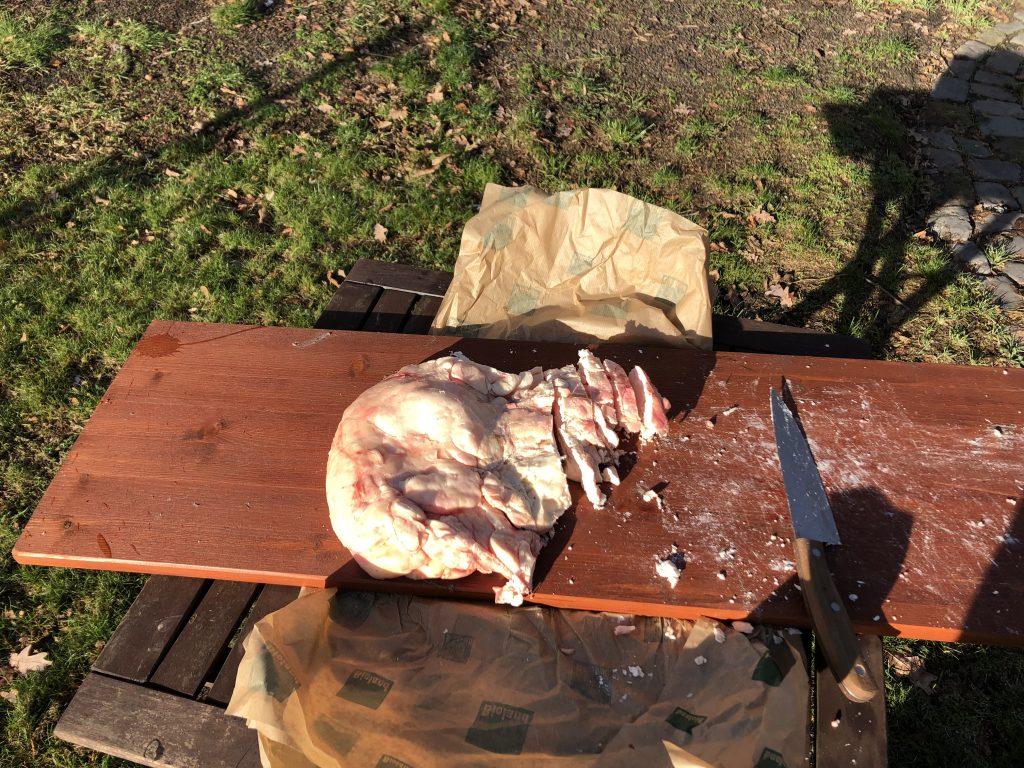
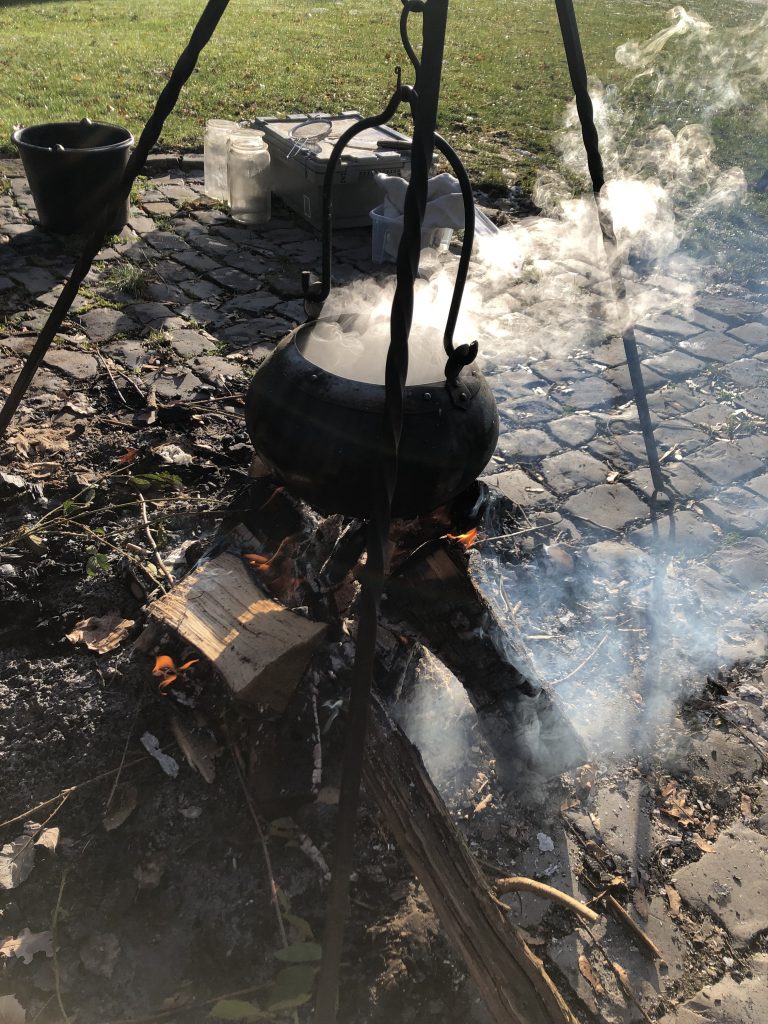
This saturday was a nice, sunny day, cold but great. I took lunch naptime as a welcome opportunity to light a fire in my outside fireplace and start making tallow.

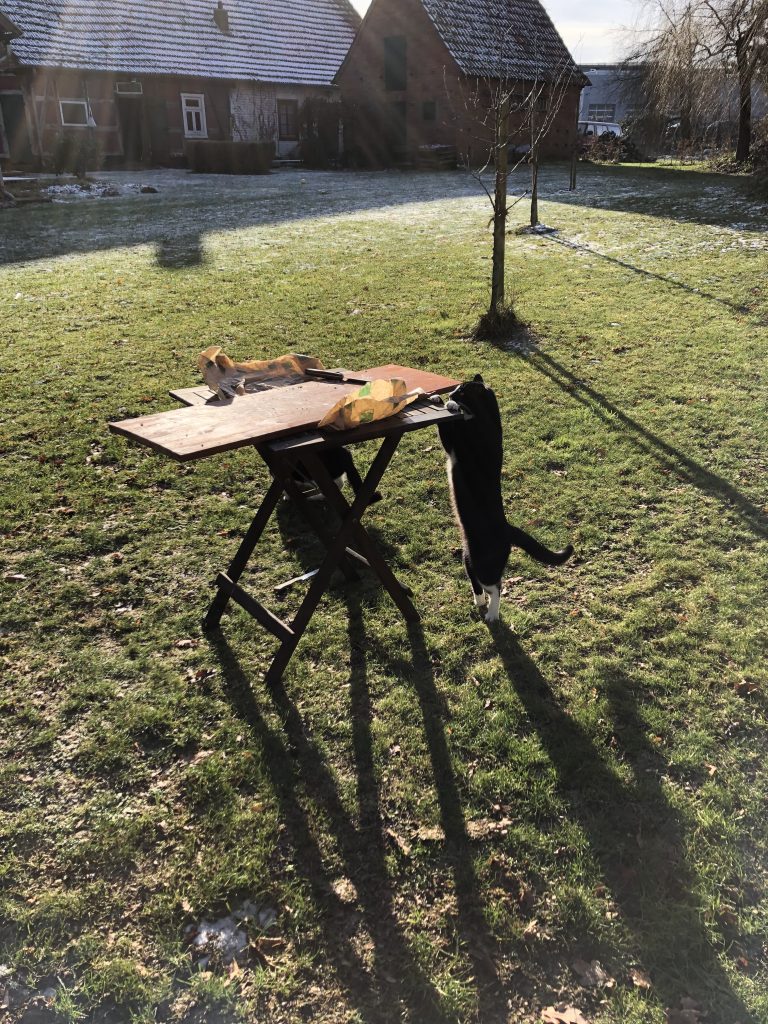
First, I cut up the first lump into small cubes – and the cats loved the scraps that fell down in the process.

Cutting up the fat.
This cat can be a bipod if it is motivated enough.

The next step was adding a little water and putting the cubes into the kettle. The water, I found out on the second run, is optional, I’d read that it makes rendering a little easier.

Around two kgs of cow fat starting to cook.

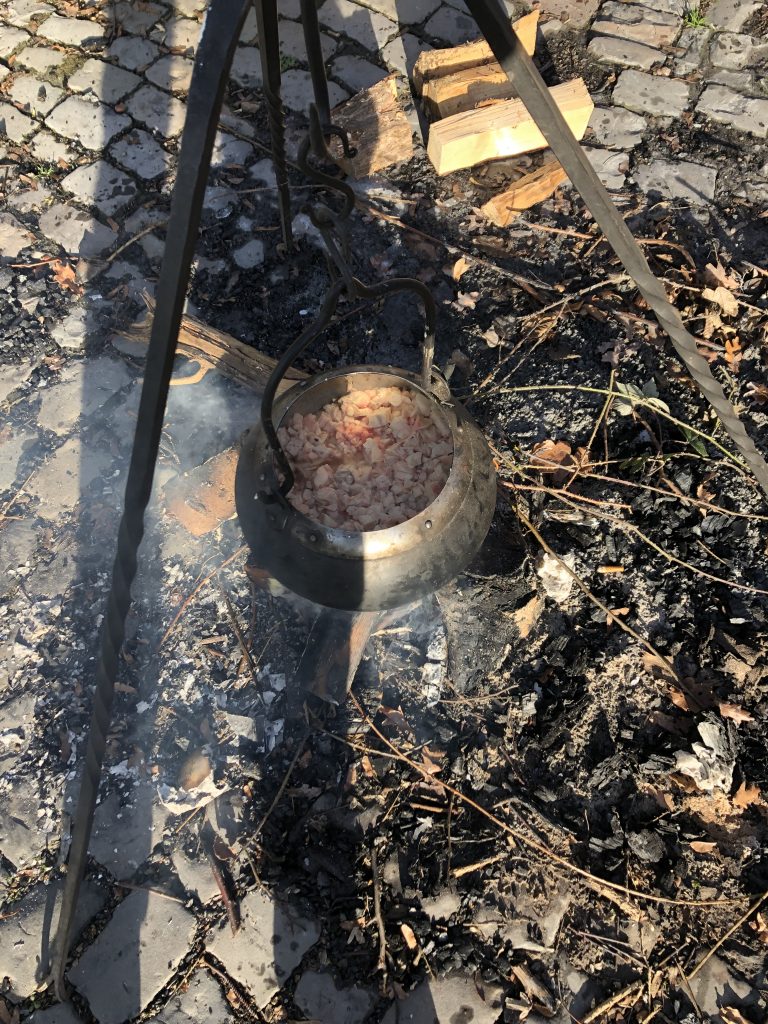
Now I let it heat up, waited until the water dissipated and started siphoning the tallow. It would have been a lot easier if I could just pour everything into a vessel, but the pot is really unwieldy and I didn’t want boiling fat all over myself.

Getting there…

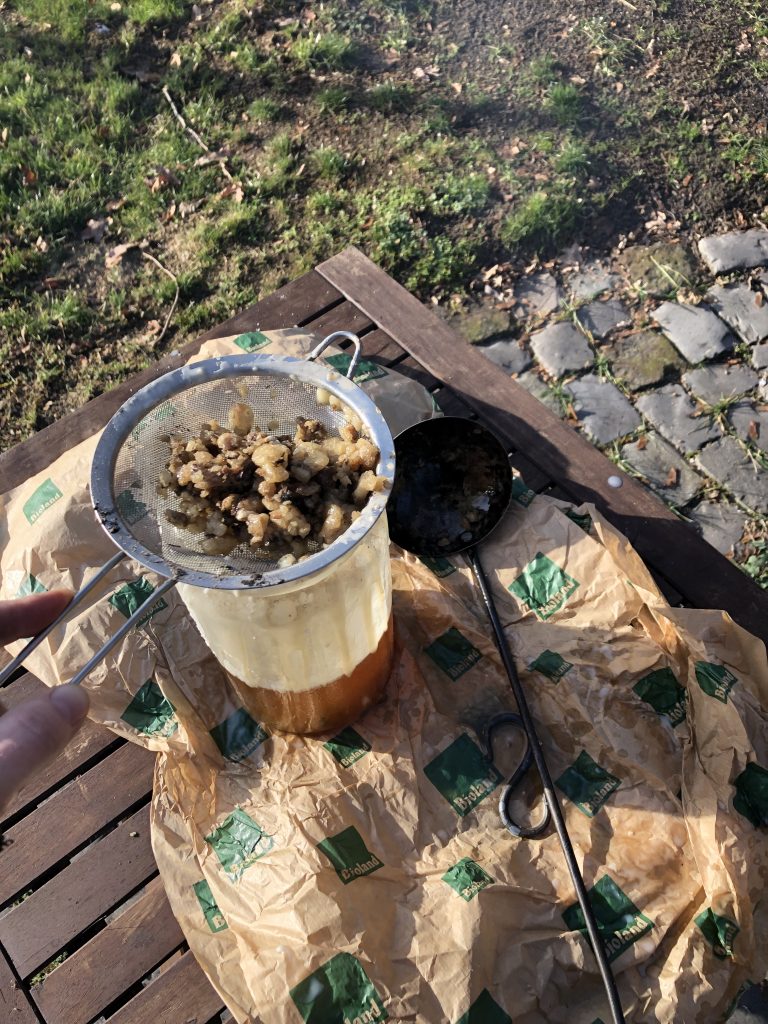
For siphoning, I used a sieve that the kids play with. Had I wanted to make tallow for eating or cosmetics, I would have used some linen, or other fabric, to get clearer results. In this case, a sieve was enough.

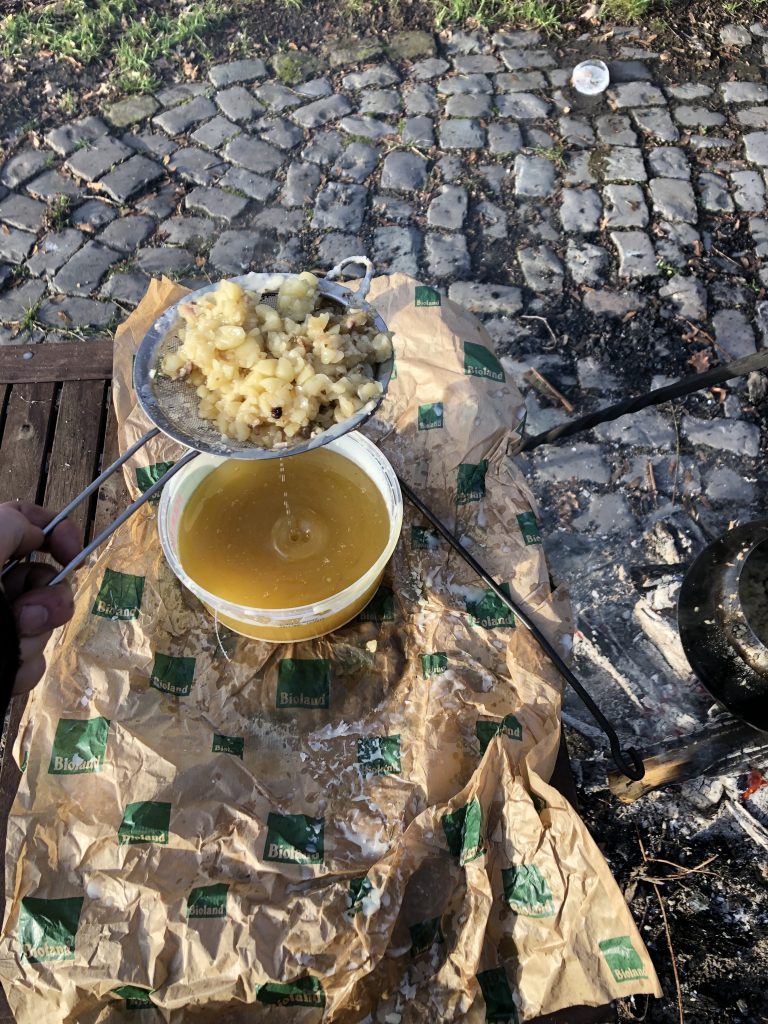
I kept doing this several times, and the pieces of fat became increasingly crisper. I threw them back into the pot to increase the yield…

Siphoning the tallow

Eventually they were so crisp that they could only serve one more purpose…

The remains of the tissue around the fat – crisp flakes of animal tissue.

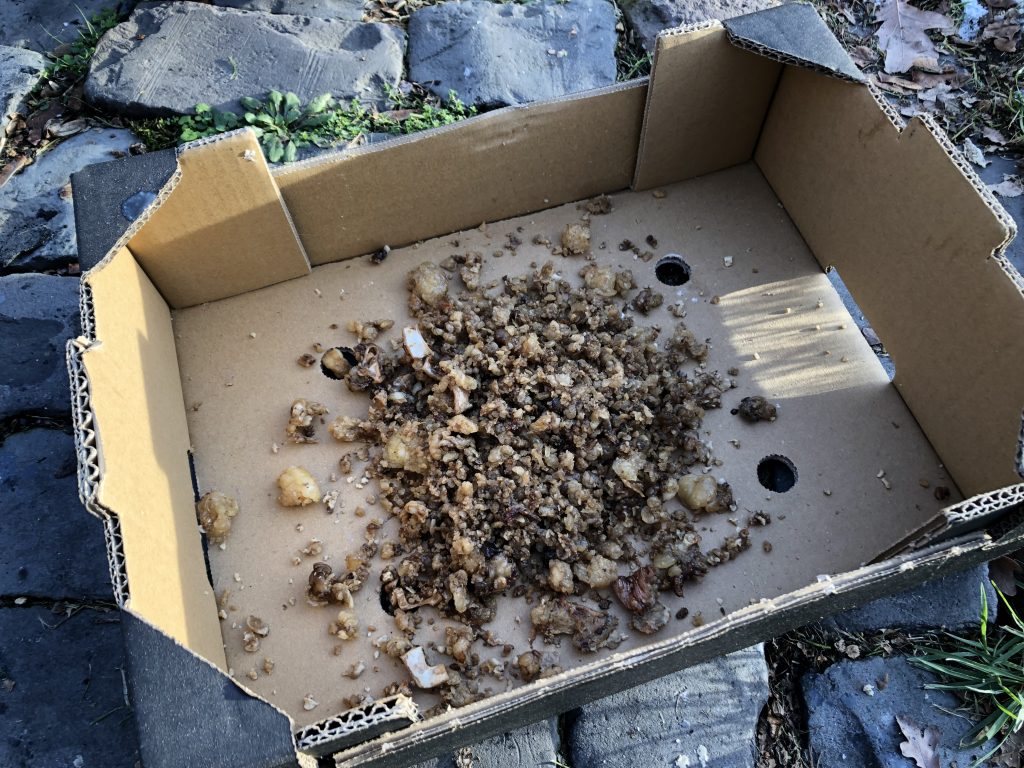
…cat snacks! I am not usually a friend of high-fat diet for our cats, but there’s talk about a really rough couple of weeks (-20°C and so on…), and maybe a little extra fat will help them stay warm outside. Or they’ll have massive diarrhoea.

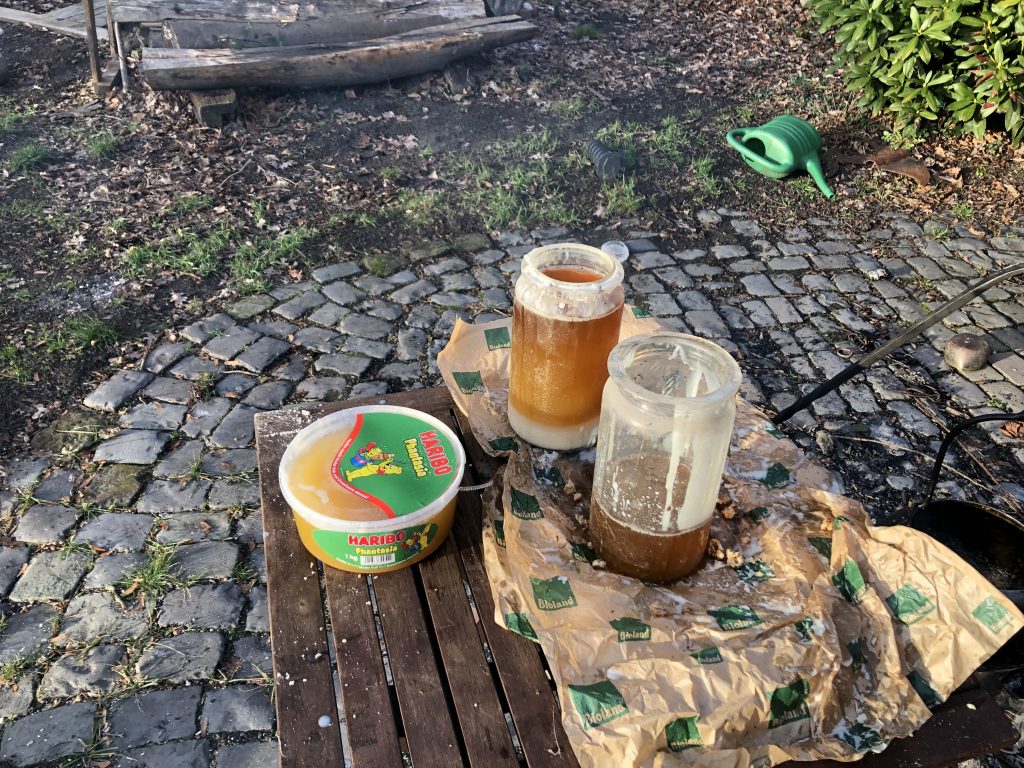
The yield of the day were 1.5 big glasses of tallow (I think one might have around two liters, but I’m not sure) and a plastic container (approx. 1 liter).

The still-hot tallow waiting to cool down.

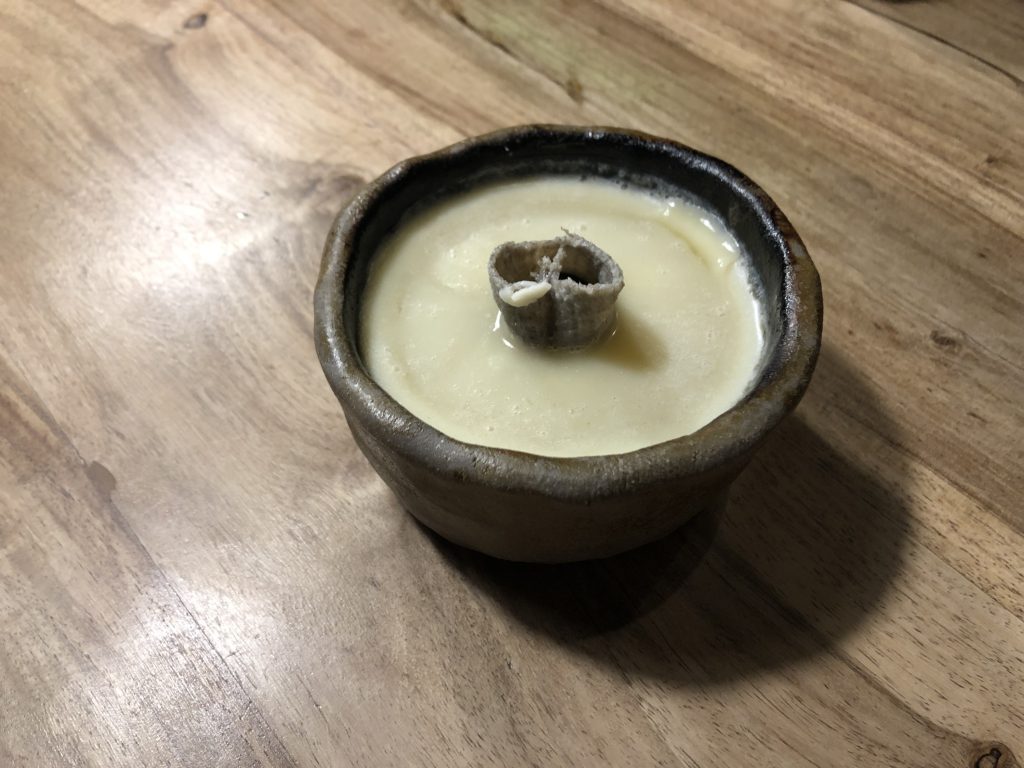
After a while, the tallow had cooled down and became about as hard as candle wax. I left it outside for natural deep freezing, but couldn’t wait to try it out. So i re-heated some of it in a small frying pan and quickly sewed a wick for my Birka light. At this point, I have to thank Katarzyna Masia Konkol for her very, very useful idea of putting a tubular wick over the cone in the middle. It works like a charm.

The finished light, filled with tallow and a fresh wick.

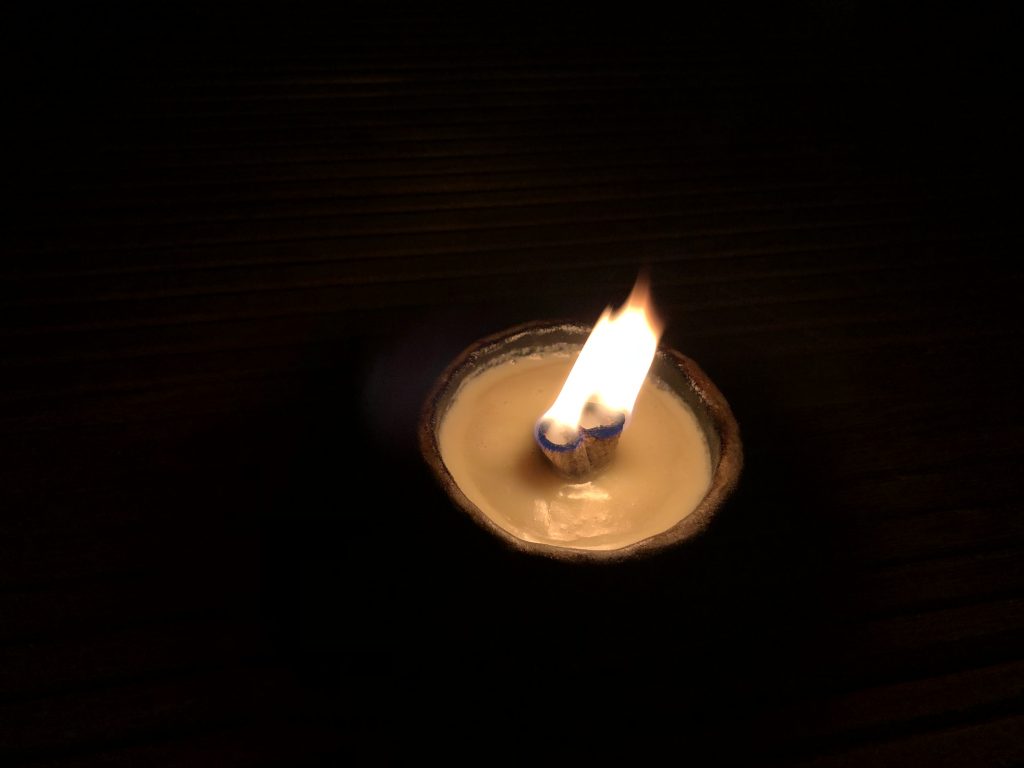
I took the light outside and lit it – and it works great!

Working beef tallow light.

If you can get your hands on cow kidney fat, try making tallow, it’s rather easy. The smell is not as bad as you might think (still, the dripping tallow is really annoying to clean, so better make this outside), and the yield is quite good. I spent less than 10 Euro on the fat, and it gave me 3+kg of tallow.

Reconstructing a belt: Deliberately damage replicas?

One of my winter projects is recreation of the carolingian silver belt buckle and strap-end from Bj750 (which might or might not have been the woman’s belt, as the grave is a double grave). I plan on using it for a new sword belt.

I bought a very nice replica from Gudred, my usual vendor for anything cast in bronze or silver. This replica is, however, not strictly speaking a 100 per cent replica, and maybe rightly so.

Replica of the carolingian belt set from Bj750, created by Vasily „Gudred“ Mayskiy

Analysis of the original find

The original finds, especially the strap-end, were modified, damaged and worn. This might be because they were already old when they were put to rest in Bj750, but also because they might have been used as „spare change“ at some point. The image from Birka I:Tafeln shows the original finds, but some construction details are hard to spot.

The strap-end is more round, even tongue-formed, than the replica. This is quite certainly due to wear, maybe also because the use as a strap-end was not its primary usage. There are trefoil brooches in carolingian design which ended up as strap dividers, and as pendants.

Anyway, I suspect that the item was not originally rounded, as the curve is not symmetrical (which it would be if it had been cast round, as numerous examples from other findplaces show). A small detail that can hardly be seen from the picture is the fact that the strap-end has been adapted for usage as a belt.

Rivets highlighted. Red: Primary or original rivets, dark green: Additional secondary rivets.

The picture above shows that there are not two rivets (as would be normal for a strap-end that is mounted at the end of a belt), but in fact seven. The rivets highlighted in red are either the original rivets (if the find was never anything but a strap-end), or rivets from the primary modification. They were then used to rivet a small silver plate (seen at the top border, overlap is visible on the top-right edge) to the strap-end. That silver plate has, in turn, five own rivet holes which were used to rivet it to the belt strap.


This method has two advantages:

  1. The belt leather surface is on the same height level as the surface of the strap-end, giving it a harmonious look.
  2. The unsightly rivet plate itself, which is of undecorated silver sheet metal, is invisible.

More interesting about this strap-end is the fact that it’s in fact decorated – if you want to call it that – on its back, too. This is a picture from Birka I: Die Tafeln.

Reverse of the carolingian belt strap-end from Bj750

The primary and secondary rivets can be seen clearly, as well as scribbled decoration. Maybe this is supposed to show some religious or spiritual beings, has ritual meaning or someone was simply bored. Birka II likens the shapes to spears or arrows.

Back of the strap-end superimposed on the front

Either by sheer accident, or on purpuse, the vertical line and the arrow-shape on the backside is in line with the frontal decoration’s symmetry axis. The text in Birka II:2 (p110) describes the spear-decorated part as „a piece of silver sheet metal riveted to the strap-end“, which is either a mistranslation or simply wrong, because the lower part obviously seems to be part of the cast strap-end.

Another strap-end from Hedeby

The strap-end in this picture was found close to the castle („Hochburg“) from Hedeby in 1812, the picture is from Arents/Eisenschmidt, die Gräber von Haithabu.

A strap-end from Hedeby

This strap-end shows very similar acanthus decoration, a more deliberate rounding at the end and – it’s decorated on the back, as well. This decoration looks a lot more purposeful than the one in Birka.

Yet another very close parallel is this find from Hedeby. Unfortunately, the findplace is unknown, it was prospected by Jankuhn and first published in his 1934 book about Haithabu. It’s a rectangular bronze part of a belt mount (?) with secondary usage as a fibula or brooch.

Mimic repairs or keep the nice look?

My question is: Should I mimic the repairs/reporpusing and the amateurish decoration, not knowing what it was intended for? Should I deliberately age and damage the replica?
The people who wore this belt clearly valued it so much that they not only repaired it several times to keep it in service, but also gave it to the deceased in their grave. Would they have access to the „nice“ version with clear edges, and no repairs, they would have used it, I presume.

However, the worn and secondarily decorated look is more accurate as a representation of the item’s *current* state.

What would you do? I’d love to read your opinions!